Toggle-on “Wells” in the sidebar to display wells in your plot.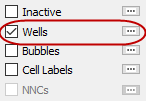

Click the Details (...) button to bring up the Wells dialog.
With the options in the Wells dialog, you can limit the wells displayed to a subset of those in the file. This helps when you have so many wells in the reservoir that displaying all of them makes it difficult to see details.
In the top region of the dialog, toggle-on “Show Wells” to display wells on your plot. This toggle matches the Wells toggle in the sidebar. You can also click the Styles button to modify the styles of your wells on the Wells page of the Plot Options dialog.
In the Display region of the Wells dialog, the box contains the list of wells from which you can highlight those you want to include. You can use the Select All button to highlight all wells. Use the Refresh button to apply your changes to the current plot.
Of course, if you have thousands of wells, choosing the ones you want to display from a box may not work efficiently. In this case, use Selection Sets.
To understand the basic concepts of selection sets, and how to create them using filters, read Chapter 7: “Filters, Selection Sets, Groups, Well Patterns, and Branches”.
Within the Wells dialog, you can create new selection sets from the list of highlighted wells AND use existing selection sets to change those highlights.
To create a new selection set (SS), start by highlighting the wells you want to include in the box (in the Display region of the dialog). Assign a name for the set (or use the supplied default), and click the Make SS button.
|
|
 Your current project file will store selection set information. To import selection set information from a project file, click the Edit SS button to bring up the
To use an existing SS to alter your chosen list of wells, highlight the set you want from the box in the lower region of the Wells dialog. Choose a rule to follow for making the changes:
• Add to selections Tecplot RS will highlight each well name from the selection set highlighted in the upper box, without disturbing existing selections.
• Remove from selections Tecplot RS will turn off each well name from the selection set in the upper box, without disturbing other selections.
• Replace selections Tecplot RS will modify all highlights in the upper list so that only the wells in the selection set will be highlighted.
Click Apply to use the selection set to alter the wells selected for display.
You can also use the pointer to change the highlighted wells. To do this, start by toggling-on “Wells” with the well labels (modify label settings in Wells page of the Plot Options dialog). This is necessary because you will be selecting the well labels with the pointer, rather than the well symbols.
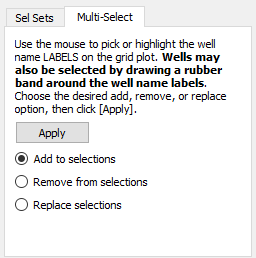
Switch to the Multi-Select page in the Wells dialog. Use the pointer to pick the wells. You can do this by rubber-banding a box around the ones you want, or by holding down Shift key and clicking individual labels. Just remember it is the labels (text) you want (any other picks will be ignored). As long as you hold down the Shift key, the well labels will accumulate.
Click Apply to use the picked wells to alter the well highlights.
|
|
 At this point, you may wish to create a selection set. Refer to