From the menu bar, choose “Paper Layout” from the Plot Type menu. Your current plots will disappear and the sidebar will change to reflect the options for Paper Layout.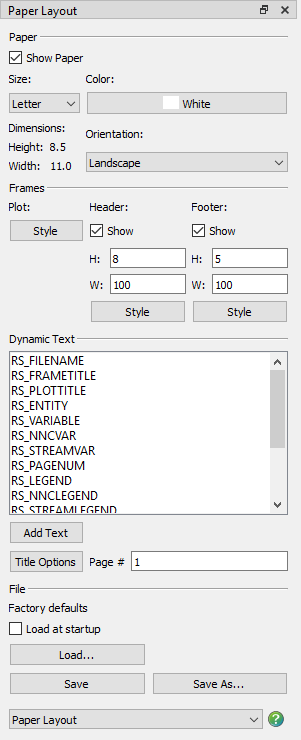
The Paper Layout Sidebar is divided into 4 primary sections:
• Paper
• Frames
Use the Paper region of the sidebar to specify the paper orientation, size and color. The Paper region of the sidebar has the follow controls:
• Show Paper Use the Show Paper toggle to include or remove the paper display from your plot. The paper display allows you to see how your plot(s) will appear on printed paper.
• Color Use the color button to change the paper background color. The paper background color will not be included in any print-outs.
• Size Use the Size menu to specify the paper size.
• Orientation Use the Orientation menu to specify the paper orientation (choose Portrait or Landscape).
Use the Frames region of the sidebar to customize the Header and Footer and the plot Frame Style in your paper layout.
Two toggles control whether to include header and footer frames.
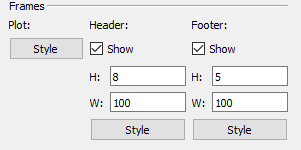
The header and footer are separate frames from the frame containing the plot. The header and footer can contain only text or geometries. You may find header and footer frames especially useful when you work with multi-frame plots, since text in these frames will not be repeated in each of the plot frames. For example, the footer frame can be used to create a title block that includes the company name, date, and page number.
Toggling-on “Show” for the header or footer in the sidebar will activate the text fields for defining the height and width. These values define the amount of space allocated for the header or footer frame, as a percentage of the paper height and width.
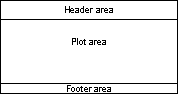
For example, a header with a 10% height and a footer with a 5% height will leave 85% of the paper available for plots:
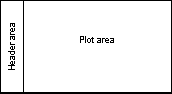
The header and footer are not limited to the top or bottom of the page. By swapping the height and width values, you can place the header on the left edge of the page
The space used by header and footer frames (if selected) will reduce the area available for the plot frames. Sizes in the range of 5 to 10% will generally produce pleasing arrangements.
While in paper layout mode, only a single plot frame displays even if you wish to design a layout for multi-frame plots. If you apply a layout to a multi-frame plot, Tecplot RS will size the frames to fit within the area covered by the single plot frame shown in paper layout mode.