Map Creation
To create a new line with the Mapping Style dialog, click the Create Map button to open the Create Mappings dialog.
The Create Mappings dialog contains the following controls.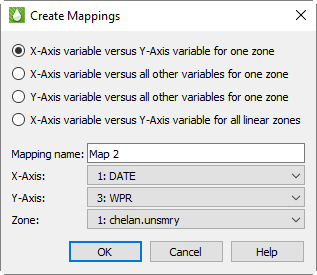
• Type of Line to Create In the first region of the dialog, you can choose which type of line you wish to create.
• X-axis Var versus Y-axis Var for One Zone (default) Choose this option to create a single line with one X and one Y variable for one zone.
• X-Axis Var versus Y-Axis Var for All Zones Choose this option to define one line for each zone, with specified X and Y axis variables. If you choose this option, you only need to specify the X and Y axis variables.
• X-Axis Var versus All Other Variables Choose this option to create a set of lines using one variable as the X variable and each of the other variables as Y variables.
• Y-Axis Var versus All Other Variables Choose this option to create a set of lines using one variable as the Y variable and each of the other variables as X variables.
• Mapping Name Type a name for the line(s) in the Mapping Name text field. Tecplot RS defaults to “Map n”, where n represents the number of mappings it will create.
• X-Axis, Y-Axis Use these controls to choose the X and Y axis variables for the new line(s).
• Zone This control designates the zone to which the new line(s) belong. Usually you will not need to adjust this.
Mapping Style Dialog Buttons
Along with the Create Map button, the Mapping Style dialog includes a few other buttons to streamline your workflow.
• Copy Map Click the Copy Map button to copy an existing, selected map, creating a new, identical map. This may streamline your map creation process, since you can adjust the copied map rather than creating a new one.
• Delete Map Click the Delete Map button to delete any existing, selected map.
• To Top Click this button to move a selected map to the top of the list of mappings in the Mapping Style dialog.
• To Bottom Click this button to move a selected map to the bottom of the list of mappings in the Mapping Style dialog.
4 - 8.3 Working With Multiple Pages, Frames and Mappings
The XY Freestyle plot type provides you with significant control over the overall layout of your plot(s) with pages and frames. Each page can have a different number of frames, as well as a different configuration of frames (for example, 2 X 3 versus 3 X 2). Similarly, each frame can have a different number of lines.
Use the + and - buttons to add or delete Pages, Frames or Lines from your workspace. Use the Page:Clr button to remove the lines from every frame on the current page. Similarly, you can use the Frame:Clr button to remove all of the lines from the active frame. The Export button provides an automated export (printing, file creation or animation) of all of the pages of your XY Freestyle plot (refer to Chapter E: “Printing and Exporting” for details).
If you plan to work with multiple frames on every page, we recommend that you first specify the number of frames you would like on the first page using the Multi-Frame Options dialog (accessed with the Manage Frames button in the toolbar) before switching to the XY Freestyle plot type. Tecplot RS uses the settings in the Multi-Frame Options dialog to establish the default number and positioning of the frames on each new page you create in XY Freestyle. However, these are easily changed from within the XY Freestyle sidebar as you work. Frames bay be added or deleted using the [+] and [-] Frames buttons, and the frame sizes and arrangements may be altered using the Arrange buttons or by simply moving and resizing the frames with the mouse.