Five major sections make up the Tecplot 360 EX interface.
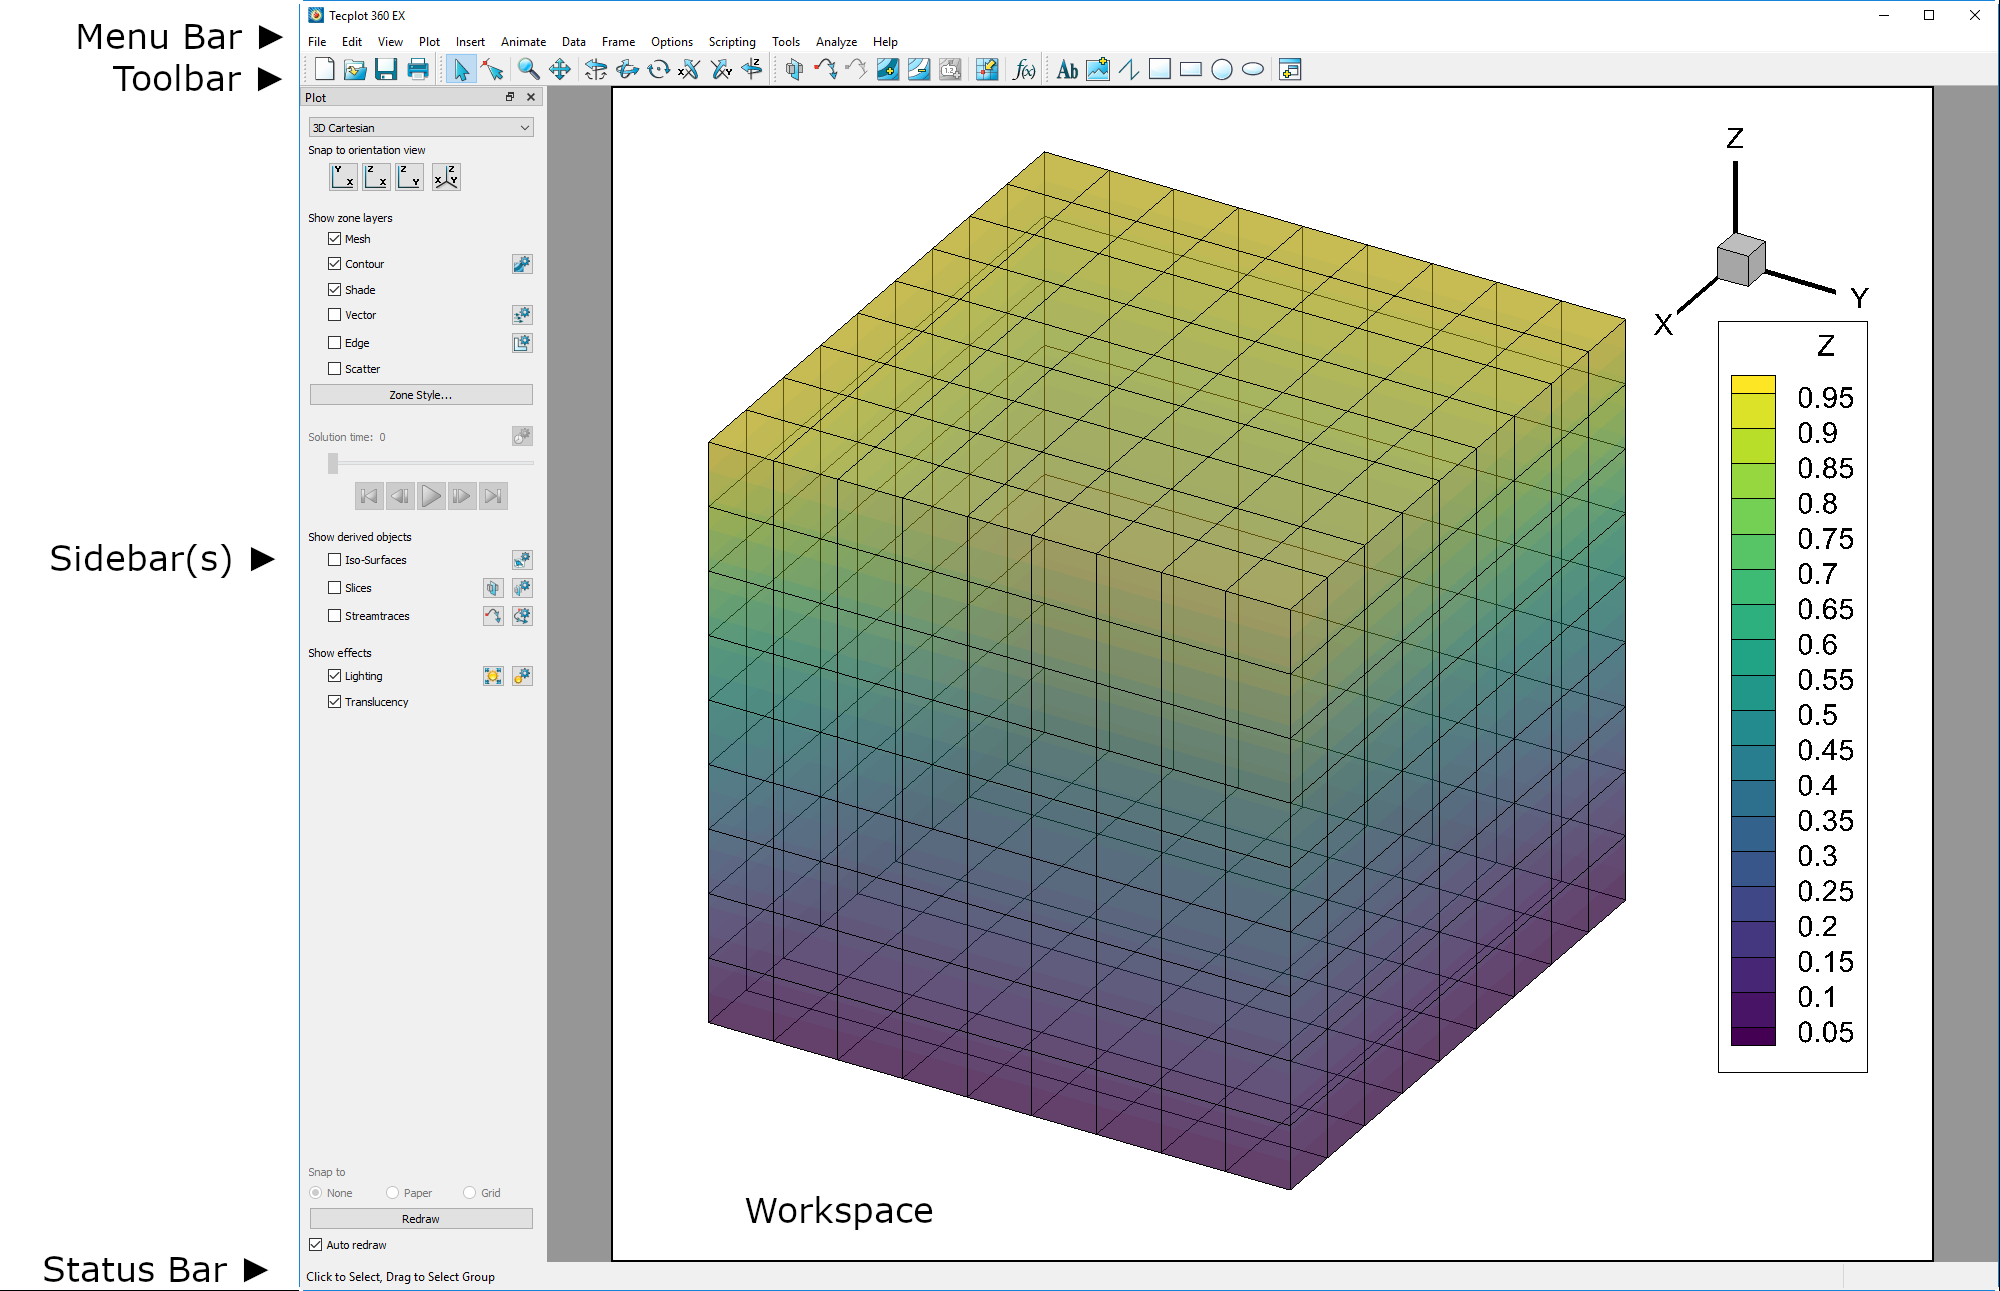
The menu bar offers access to Tecplot 360 EX features.

Tecplot 360 EX's features are organized into the following menus:
• File - Use the File menu to read or write data files and plot layouts, and print and export plots.
• Edit - Use the Edit menu to select, undo, cut, copy, paste, and delete objects, and to change the draw order for selected items.
|
|

• View - Use the View menu to manipulate the way your data is shown or to open a sidebar or the Welcome Screen. See “View Modification” on page 42.
• Plot - Use the Plot menu to control the style of your plots. The menu items available depend on the active plot type (chosen in the Plot sidebar).
• Insert - Use the Insert menu to add text and geometries (polylines, squares, rectangles, circles, and ellipses). If you have a 3D zone, you may also use the Insert menu to insert a slice. If the plot type is set to 2D or 3D Cartesian, you may insert a streamtrace.
• Animate - Use the Animate menu to create animations of your plot.
• Data - Use the Data menu to create, manipulate, and examine data. Types of data manipulation available in Tecplot 360 EX include zone creation, interpolation, triangulation, and creation or alteration of variables.
• Frame - Use the Frame menu to create, edit, and control frames.
• Options - Use the Options menu to control your Tecplot 360 EX experience, including rulers, grids, and performance.
• Scripting - Use the Scripting menu to play or record macros, and to access the Quick Macros Panel.
• Tools - Use the Tools menu to launch an add-on.
• Analyze - Use the Analyze menu to examine grid quality, perform integrations, generate particle paths, extract flow features, and estimate numerical errors.
• Help - Get help for Tecplot 360 EX features, or view the About dialog, which contains version and platform information.
1 - 3.2 Context Menu and Toolbar
In many places within Tecplot 360 EX, clicking with the right mouse button displays a context menu that gives you quick access to just the operations most relevant to what you're clicking. Often, these operations are also available in some other way, such as using a toolbar button, the pull-down menus, or a dialog.
In the Tecplot 360 EX workspace, the following objects have context menus with the specified functions:
• Frames - Change frame order, load and save frame style, frame details
• Axis - Axis settings
• Slices - Hide, edit slice details, extract slices, slice style
• Iso-surfaces - Hide, choose variable, edit iso-surface details, extract surfaces, change iso-surface style
• Zones - Hide, deactivate, zone style
• Streamtraces - Extract, delete, streamtrace settings
• 3D orientation axis - Hide axis, axis settings
• Line maps - Deactivate, copy, change curve type, mapping style, Fourier transform (when applicable), show curve details on plot; write curve details or data to file
• Legends - Hide, change box type, legend settings
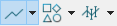
• Geometries (shapes) - Change line and fill color, delete, edit geometry settings. For polylines, you may also extract data along the line.
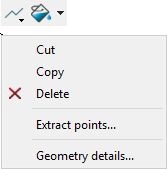
• Text - Change color, cut, copy, delete, align(left, right, center, top, bottom), text settings.
 When working with zones, slices, and iso-surfaces, a context toolbar appears above the context menu. This toolbar allows you to turn on or off the grid, contour, vector, shade, edge, and translucency layers for the selected object(s) by clicking the icons. (Iso-surfaces do not have vector or edge layers.) Additionally, you may adjust frequently-used style settings for each layer using the drop-down menu to the right of each icon, for example selecting a color for the grid (or choosing a variable by which to color it).
 A different context toolbar appears when you right-click a line in XY or polar line plots. This toolbar allows you to turn on or off the line, symbol, and error bars for the selected line map by clicking the icons. You can also adjust the attributes of these (for example, line color, symbol shape, or error variable) using drop-down menus to the right of each icon.
 When a geometry object is right-clicked, the Geometry context menu appears. This menu allows you to Cut, Copy, Delete the object as well as adjust the line and fill attributes. When multiple geometries are selected, the Alignment of the objects can be adjusted as well.
 Right-clicking on a Text object brings up the Text context menu. This menu allows you to Cut, Copy, Delete the object as well as change the alignment or open the Text details dialog. You can also adjust the text attributes such as bold, italics, color, and text angle.
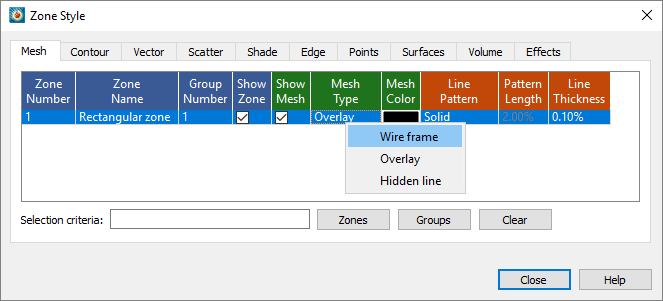
In some places, such as in the Mapping Style and Zone Style dialogs, right-clicking is the primary way to alter the displayed data.
|
|
 The right mouse button is also used for translating (moving) the plot. This doesn't conflict with its use for context menus. The context menu appears when you right-click without moving the mouse;